MySQL and Databases
Please note that database knowledge is a foundational pre-requisite
for our course. As such, you should have EDUPE access for your
database already. If you don't have that access anymore or if you're
having issues getting reliable access to EDUPE, you can instead
install MySQL locally on your own local computer or, if you're
comfortable, use a free online MySQL hosted server (both options are
discussed in the sections below).
You can review the basics of database access from the Module's Lesson and also from the links below:
MySQL Alternatives
Some great online MySQL alternatives are:
You can also see a list of free MySQL online servers here: https://www.quora.com/Which-is-the-best-MySQL-hosting-site-for-free
Install MySQL Locally
But if you are interested in installing MySQL locally, let's start by downloading the MySQL Installer from here: https://dev.mysql.com/downloads/windows/installer/5.7.html (there might be a newer link, though, as it updates quite often; also, I'll assume we're doing a Windows installation here).
You will need the Server, Notifier, JConnector (for Java, this should the JDBC Driver) and MySQL Workbench (a great tool for managing your server and it has a really great DB design UML tool).
The generic MySQL package download is also available here:
https://dev.mysql.com/downloads/installer/
If you're installing it on Windoze, you might have to also ensure you have the correct version of the Visual C++ redistributable package. If you have a newer one (say, 2017 or later), you might run into an issue with the workbench installation as detailed here:
https://stackoverflow.com/questions/43172345/mysql-workbench-installer-requires-visual-c-2015-redistributable-package-to-be
The current version of MySQL (which might change by the time you read this), requires the 2015 version so you might just have to uninstall the 2017 (or later) version and install the 2015 version (only do this if it complains during installation, though!).
Creating the Schema
For now, we will only cover the basics of how to create a new Schema (or Database) and a new user that is restricted to accessing that particular database.
-
Locate your Notifier in your system's task bar (this assumes a Windows system, of course):
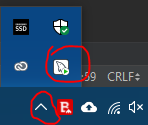
-
Right click and Start the server
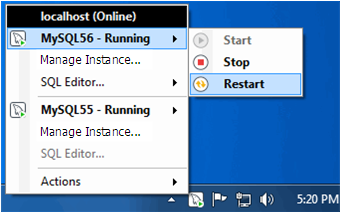
image taken from here, which has a lot of great information: https://dev.mysql.com/doc/mysql-startstop-excerpt/5.5/en/windows-notifier-usage.html
-
In the Notifier menu, click on Manage Instance to bring up the Workbench; if this doesn't work, you can find the MySQL Workbench in your start menu.
-
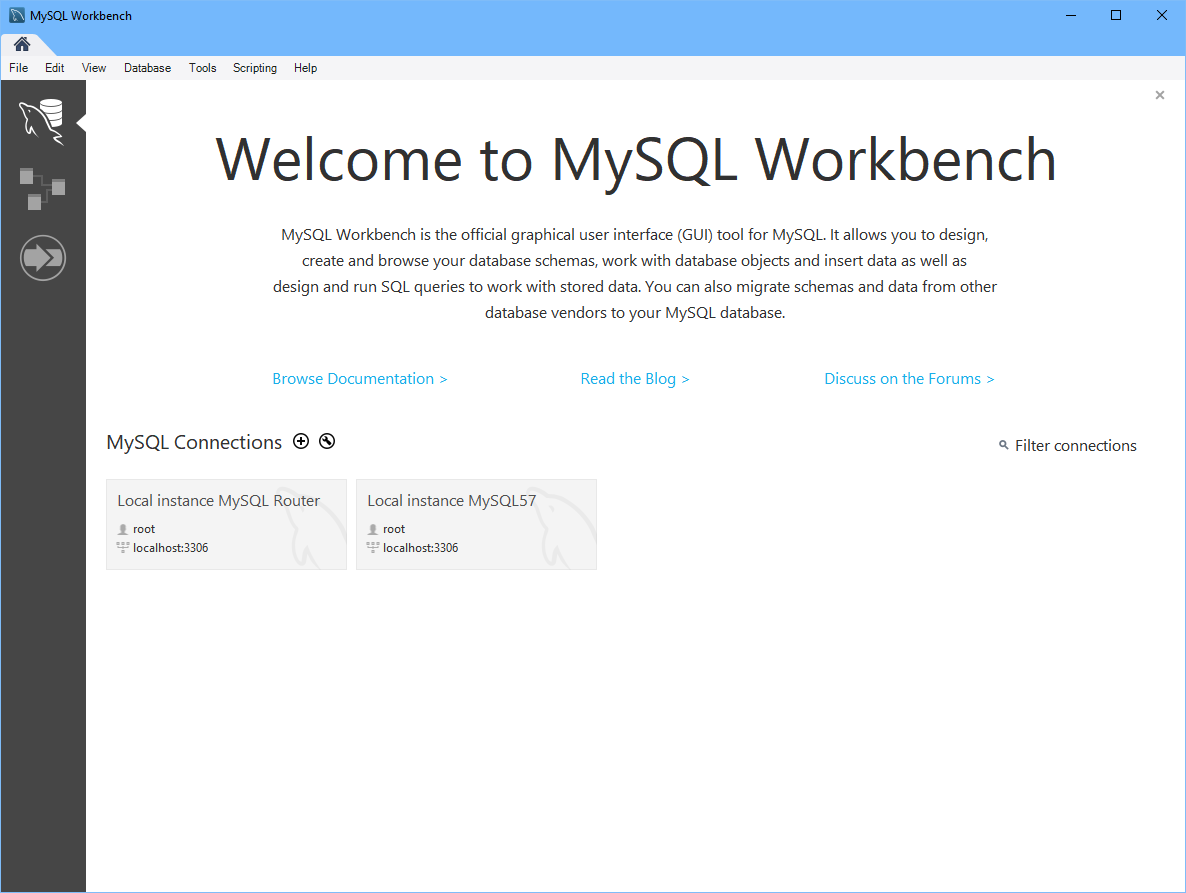
This should look something like this (I'm afraid I had an older version when I took the screenshot)
-
Now let's pick the Local instance MySQL57 (your version might vary) and enter the Root password.
NOTE: The Installer should have prompted you to create a root password during setup - I haven't done this recently, but the documentation states that initializing a root password during install is now required. I would highly recommend making a very simple root password (like the word password itself) unless you need to put this into production.
-
After opening the instance, you should see something like this:
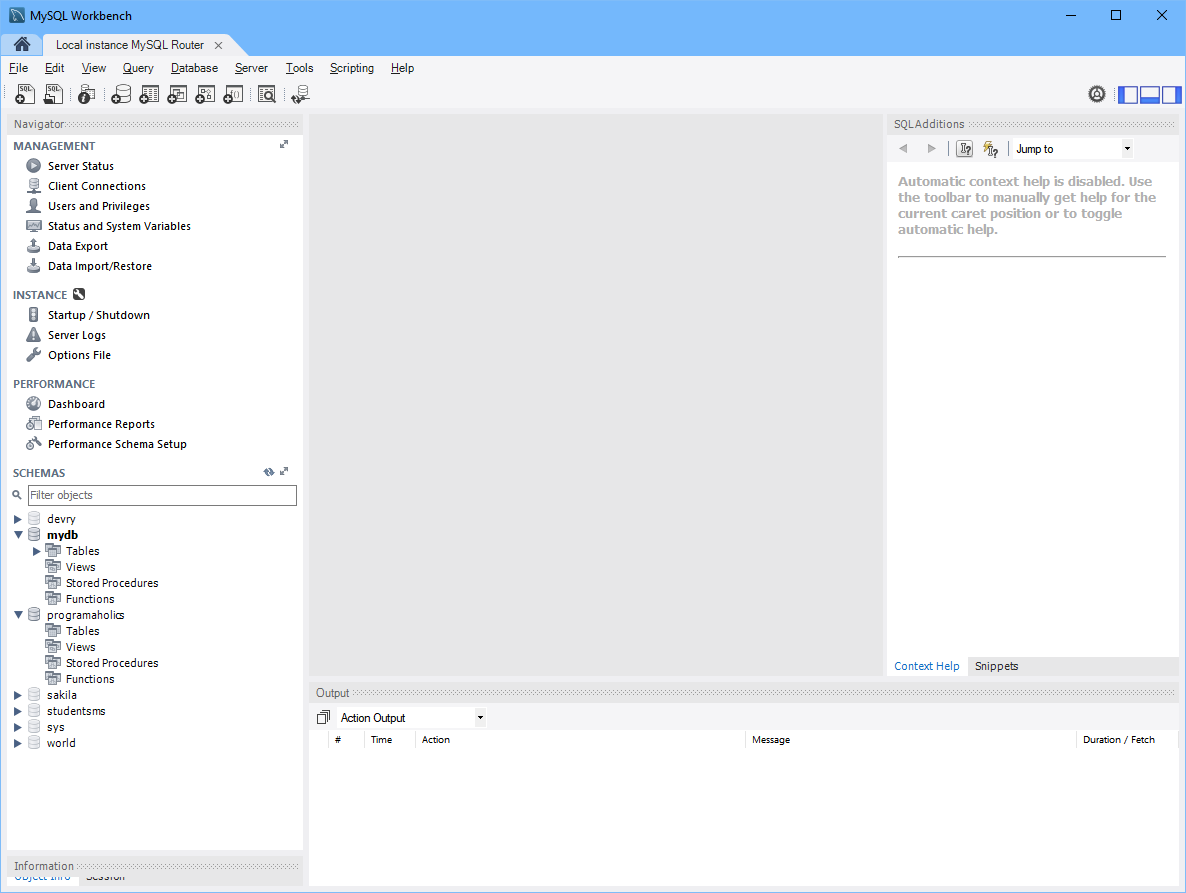
You'll want to become familiar with this screen as it is a great tool.
-
We are now ready to create a Schema (a Database that will hold tables)
Click the add Schema button (highlighted in the top bar)
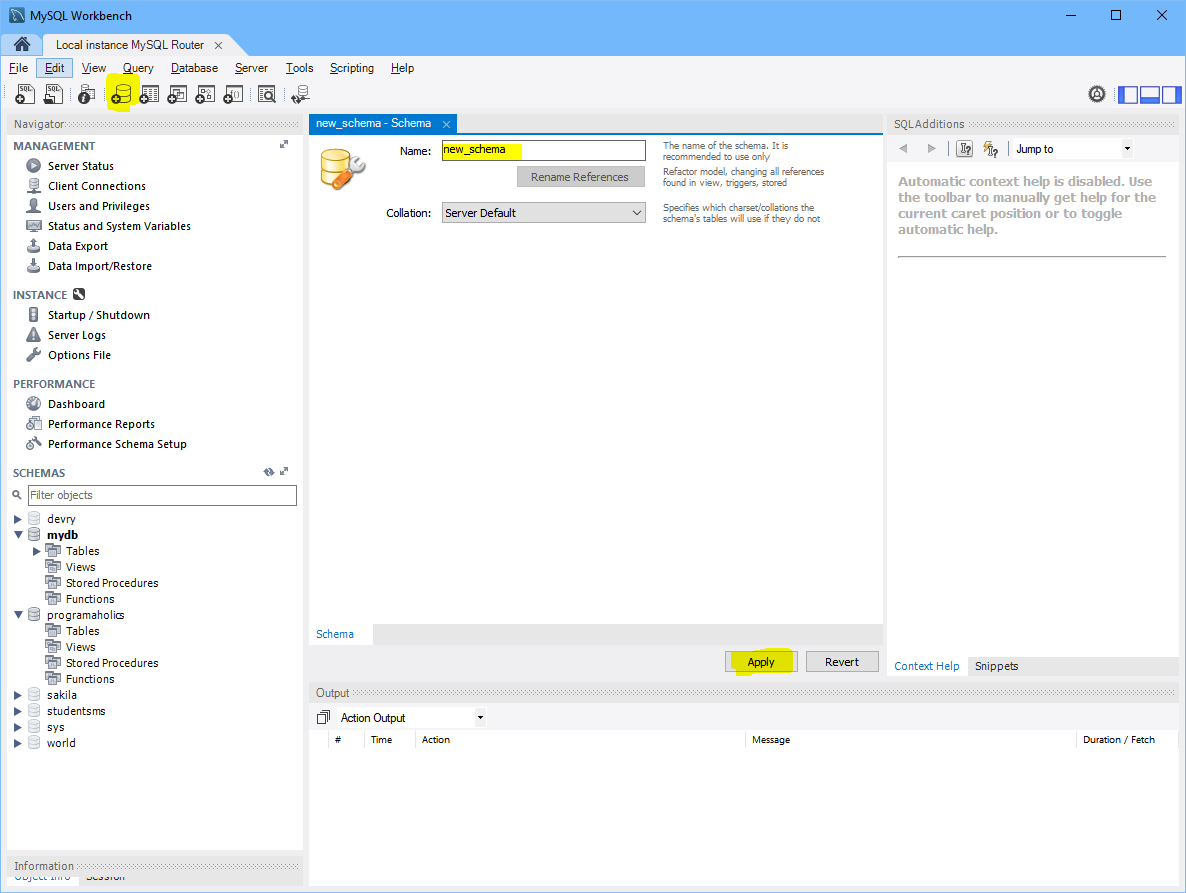
For this example I am creating a DB called contacts, which I will be using with the Week 6 Practice, so I will enter contacts into the name field and click "Apply."
-
Schema creation wizard, leave as is:
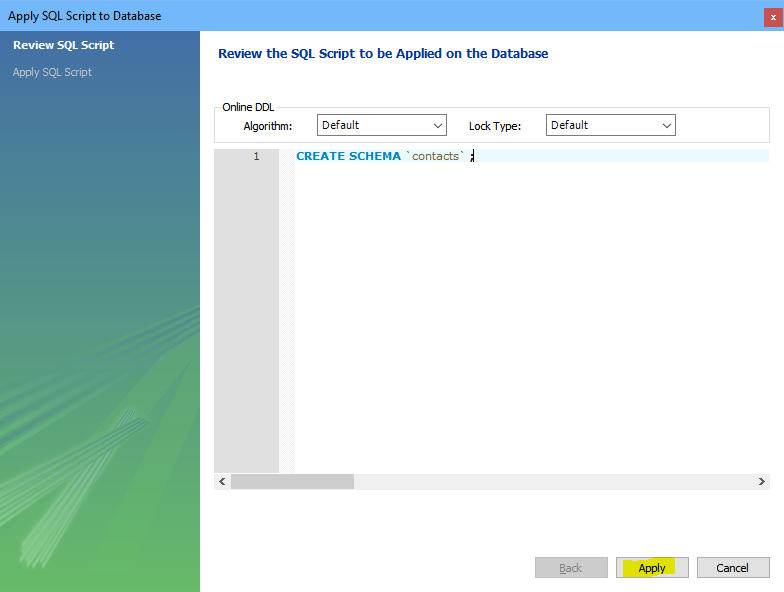
Click Apply.
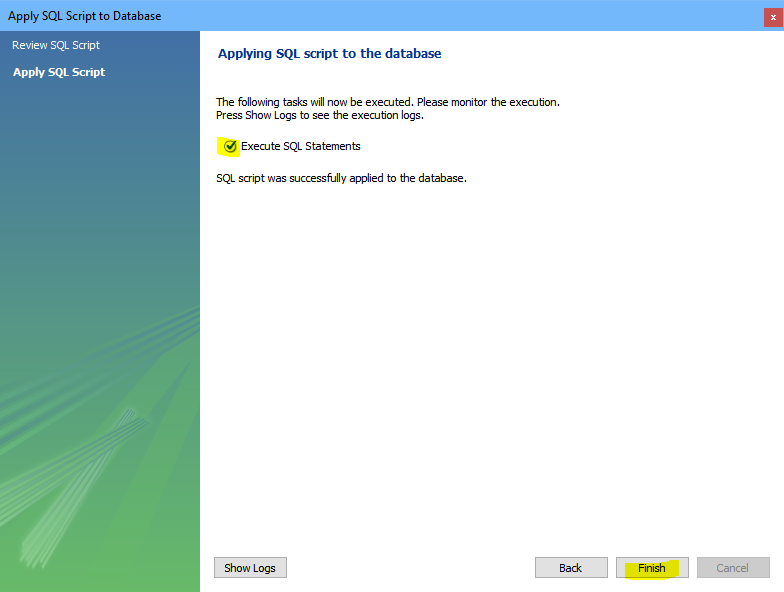
Click Finish.
NOTE: Ensure Execute SQL Statements is checked
-
Verify that your new Schema has been added:
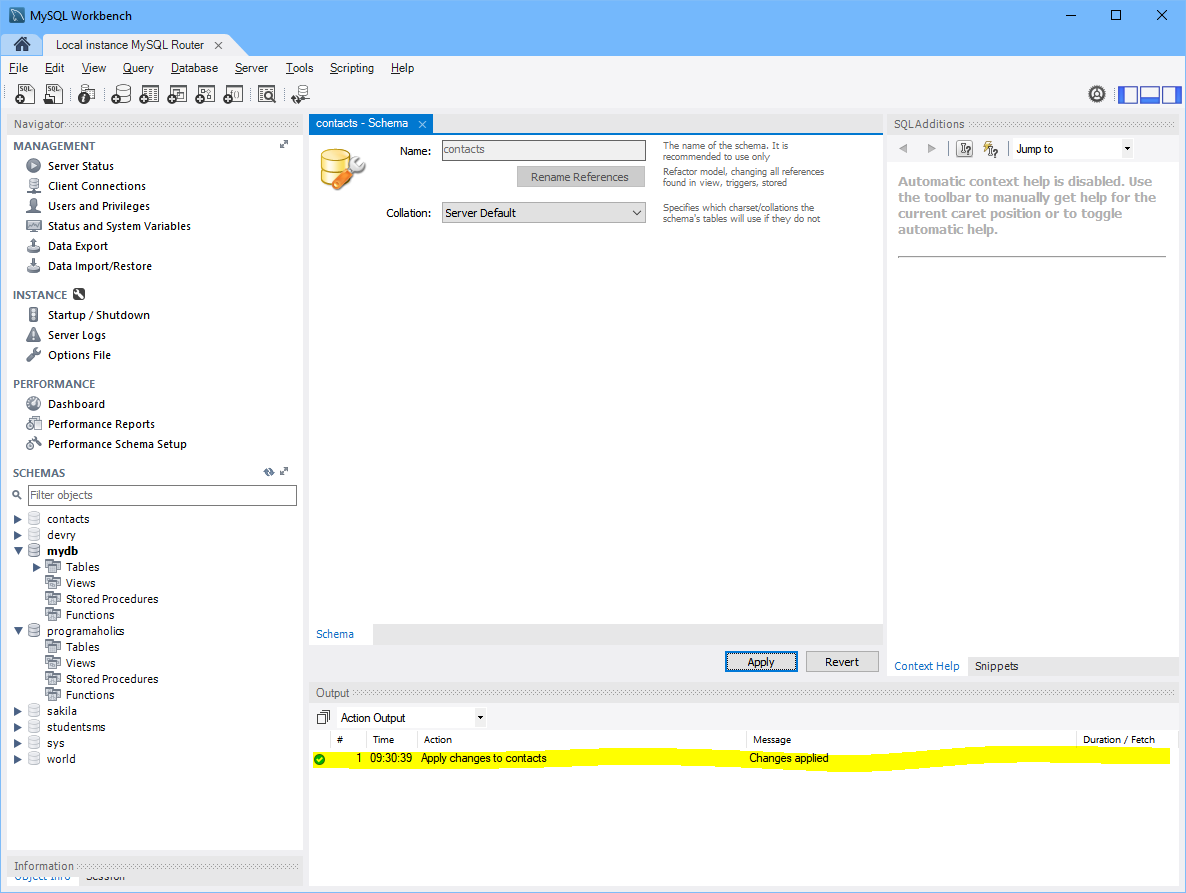
NOTE: You can see the Action Output message, or you can see the contacts Schema under the SCHEMAS navigation on the left bar.
- Don't exit the workbench yet!
Creating a new user
In order for our program to access the newly created schema, our program must provide a username and password to be allowed into the server. So far, the only account we have created is the root user, and it is a bad idea to use the root user to access the new server unless absolutely necessary.
-
Using the same Workbench session, let's do the following.
-
Click "Server" on the top menu, followed by "Users and Privileges"
-
You should see a screen like this:
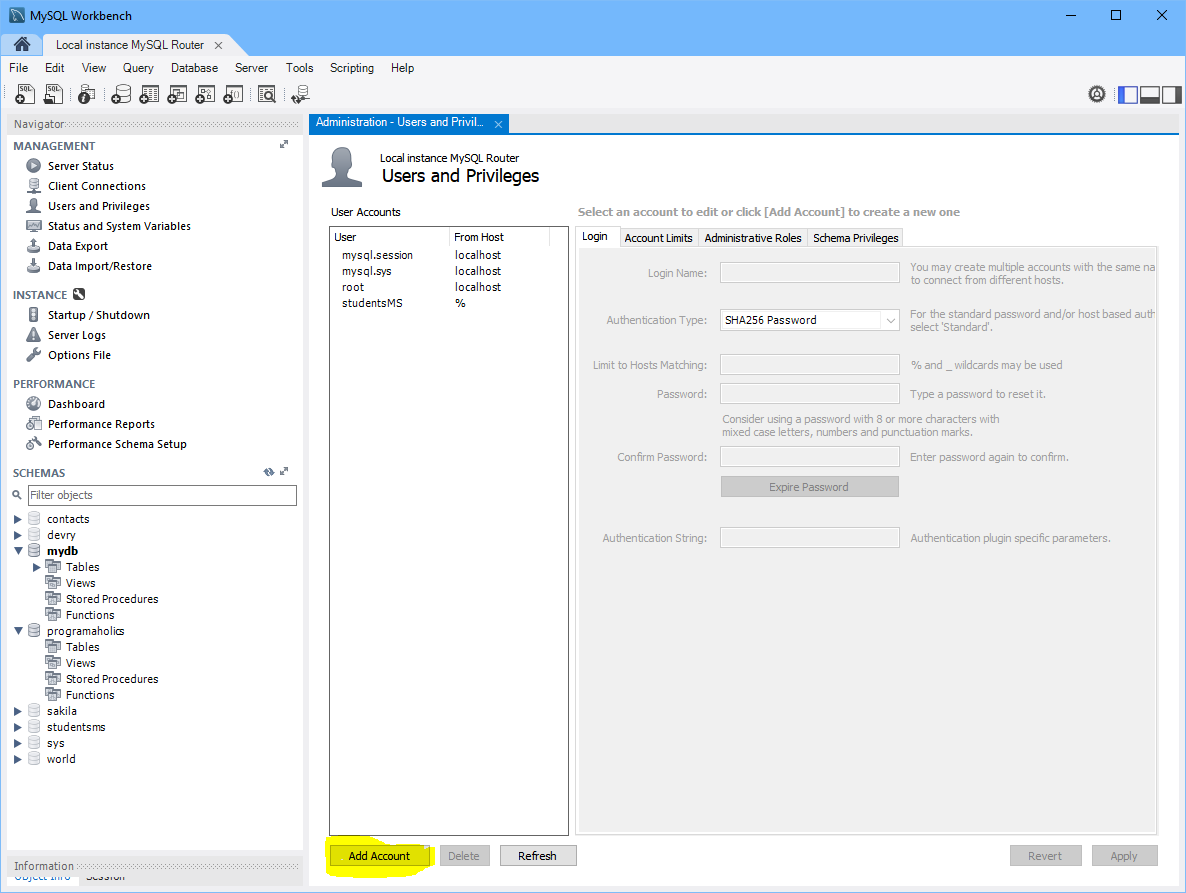
-
Click Add Account (highlighted in yellow above).
-
Let's setup the username and password:
I chose contactsUser for the username, and this links the user to the particular schema it will be accessing.
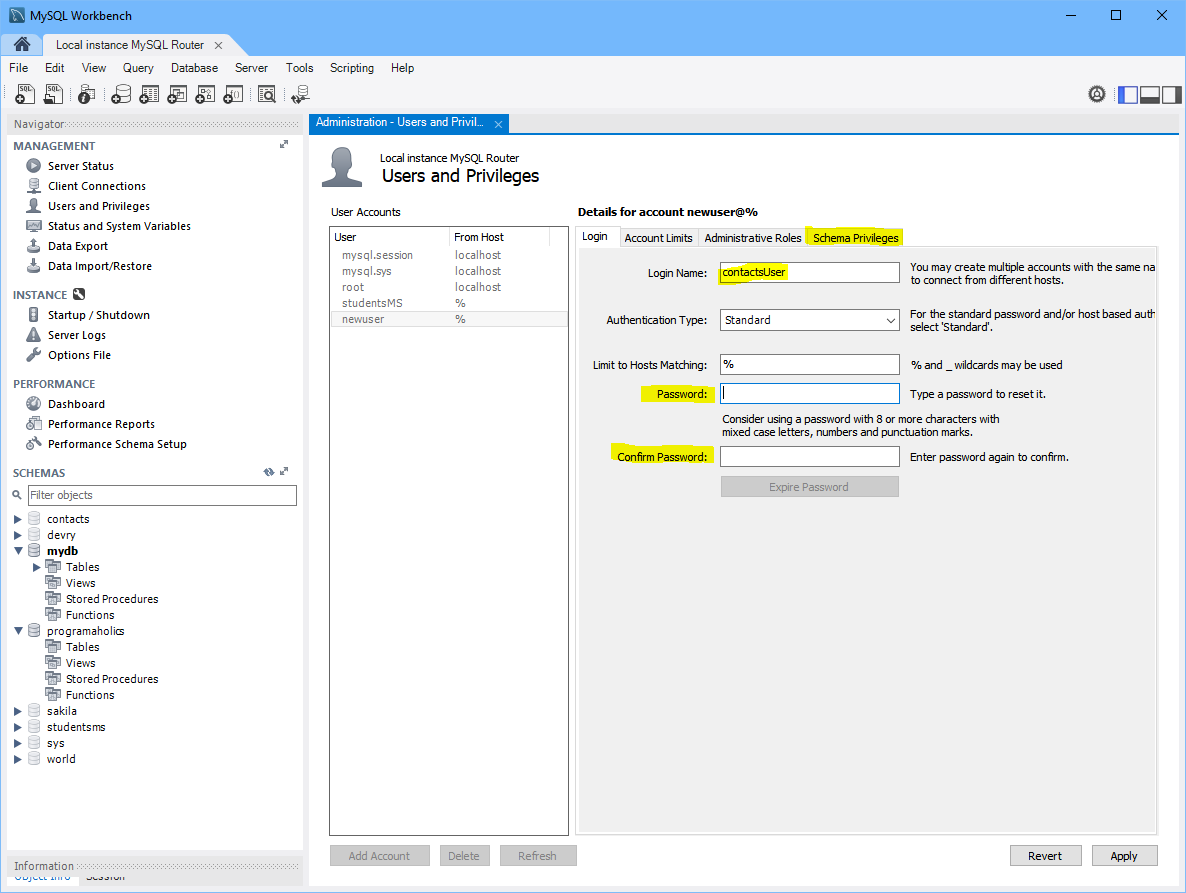
Create and confirm your password choice and Click on Schema Privileges when you are done.
-
Add the SCHEMA to your user's privilege (Multiple steps here):
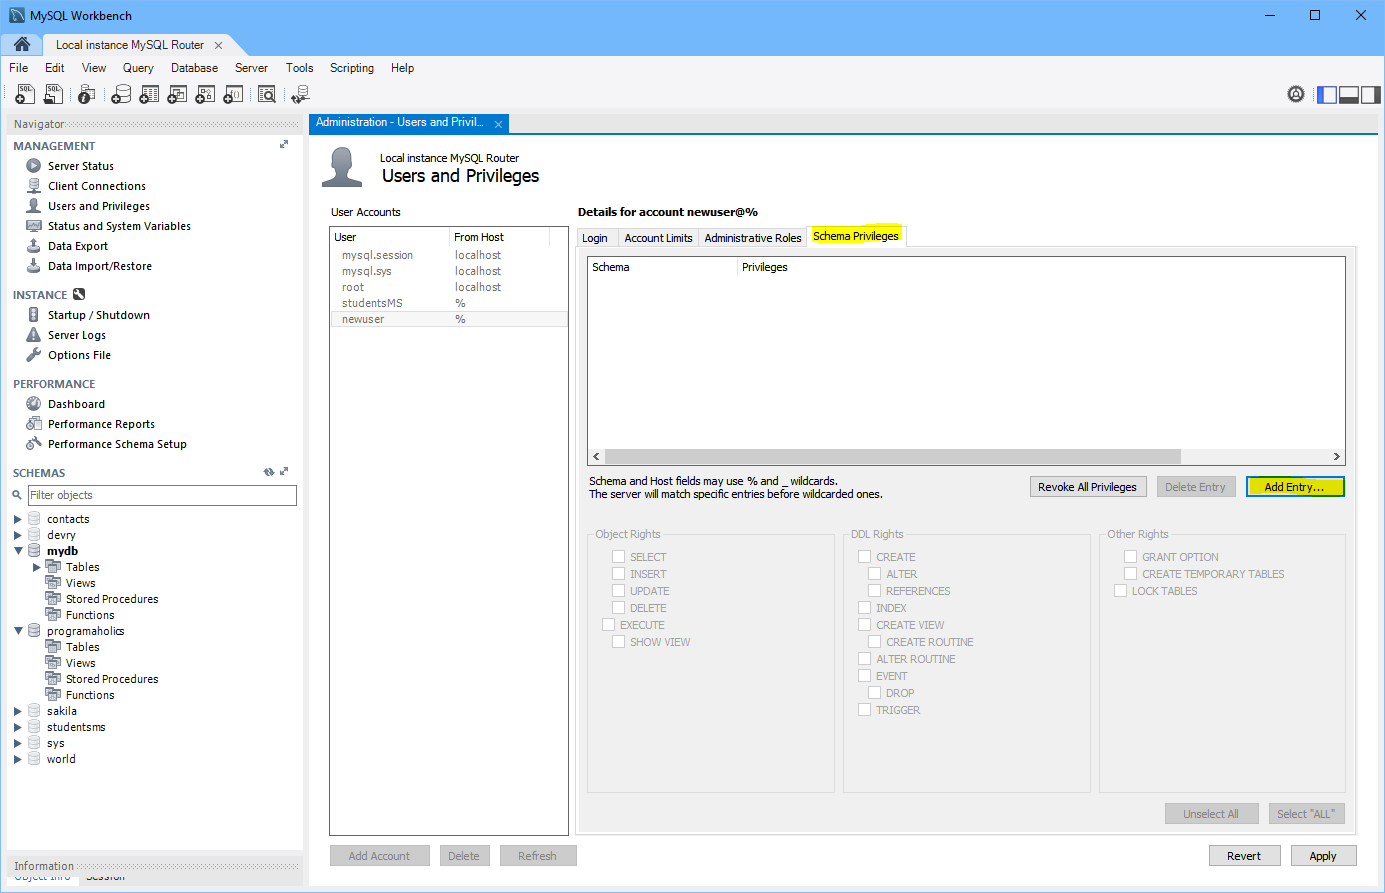
-
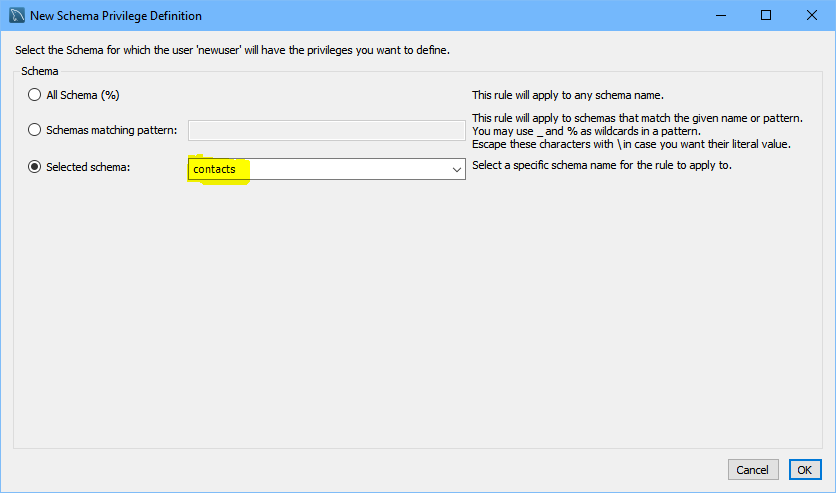
Click Add Entry and pick the Schema your user will be allowed to access.
-
Click OK
-
You should now see the schema in the user's screen:
-
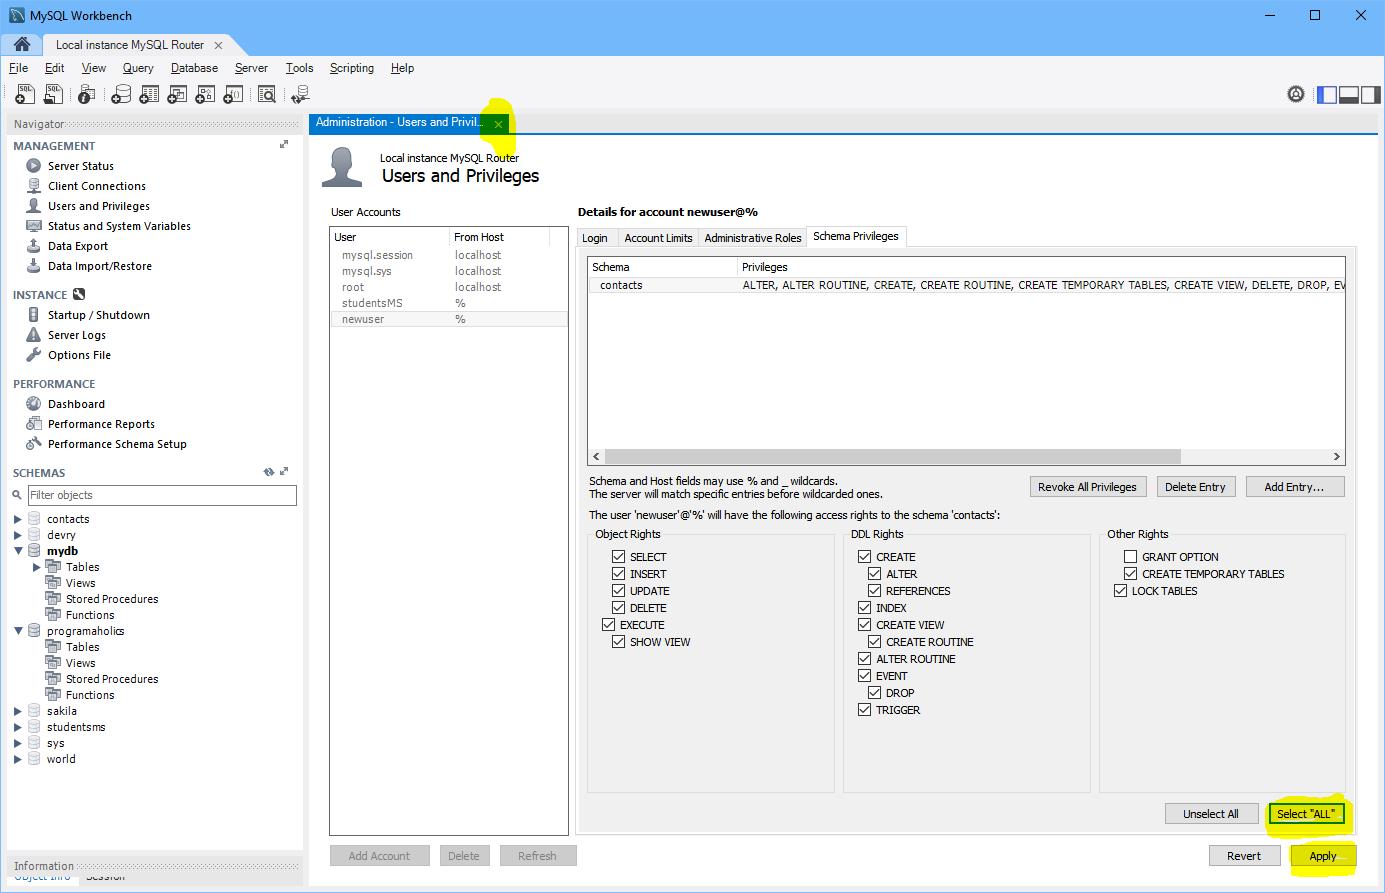
click SELECT ALL button, or hand pick each one for which you want to grant permission - I just do select all for simple new setups like this usually.
-
click Apply.
-
Now we are ready to create a new table!
Click the new SQL Tab button
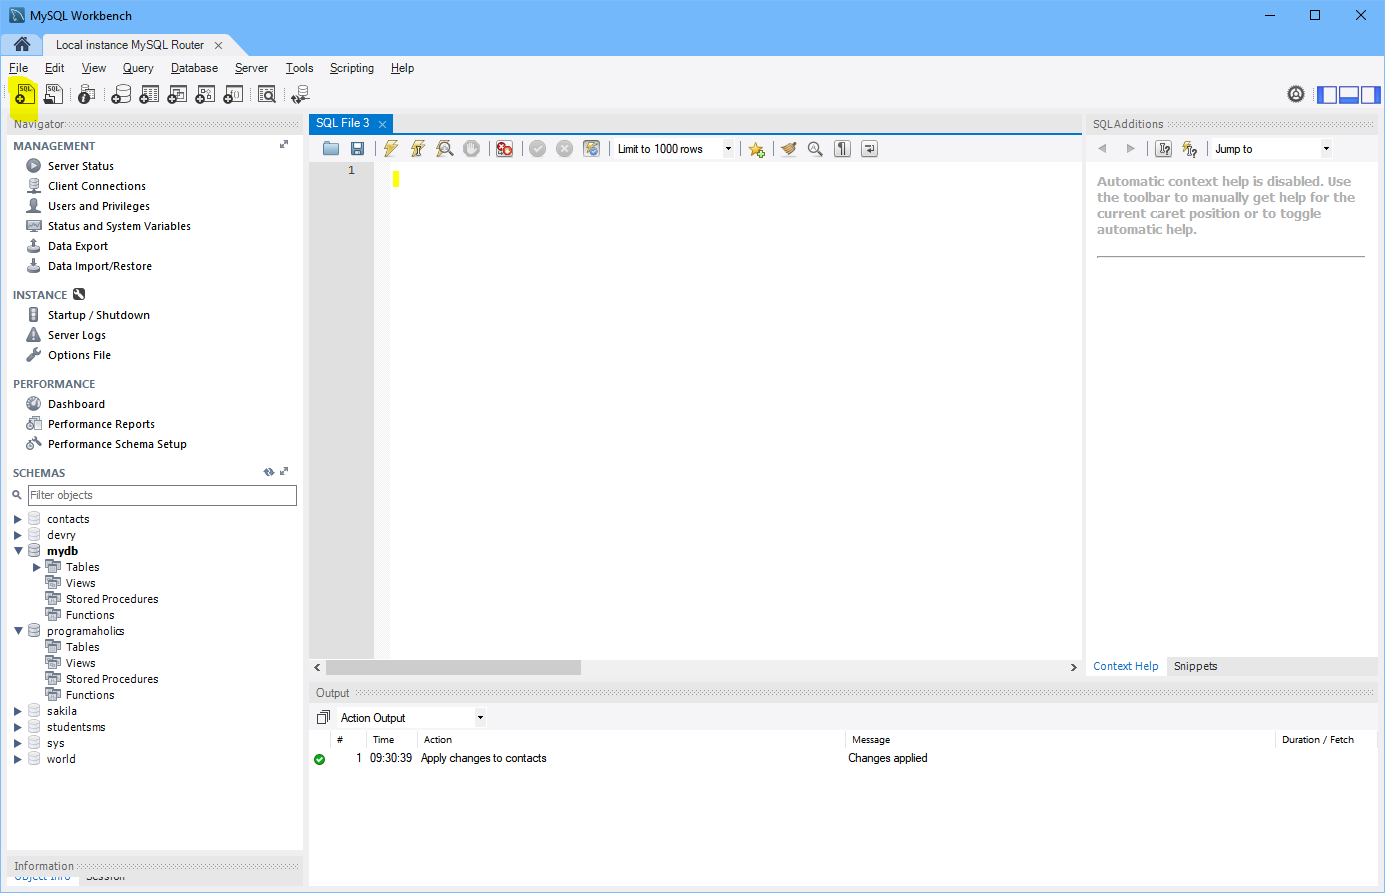
In this window, select the schema you created by typing
USE contacts;
This will set the contacts schema as active and all the queries you type will be executed against it.
For example, for the Lab 6 schema I used:
Create table students (
 name VARCHAR(50) PRIMARY KEY,
 score1 int,
 score2 int,
 score3 int,
);
This created a table called students that I can later access from my Java program, using the username and password I created and the local server with the string:
conn = DriverManager.getConnection("jdbc:mysql://localhost:3306/<SCHEMA-NAME>?useSSL=false", <user>, <password>);
Sample Java Code
Here is what some sample code might be to utilize that database:
public class demo {
	public static void main(String[] args) throws SQLException {
		Connection myConnection = null;
		Statement myStatement = null;
		ResultSet myResultSet = null;
		String user = "student";
		String pass = "student";
		try {
			// 1. Get a connection to database
			myConnection = DriverManager.getConnection("jdbc:mysql://locahost:3306/demo", user, pass);
			// 2. Create a statement
			myStatement = myConnection.createStatement();
			// 3.Execute SQL query
			myResultSet = myStatement.executeQuery(("select * from employees");
			// 4. Process the ResultSet
			while (myResultSet.next()) {
				System.out.println(myResultSet.getstring("last_name") + ", " + myResultSet.getString("first_name"))
			}
		} catch(Exception e) {
			e.printStacktrace();
		} finally {
			// 5. Release the resources
			if (myResultSet != null) {
				myResultSet.close();
			}
			if (myStatement != null) {
				myStatement.close();
			}
			if (myConnection != null) {
				myConnection.close();
			}
		}
	}
}
I hope you find this helpful but please do check the other guides and informational links on stackoverflow, etc., and, of course, feel free to post questions about it, as well!